Wednesday, December 31, 2008

Notes

I've always liked keeping notes. There is something about making little drawings or lists of things or just trying to capture one's thoughts in a quick brief caption or blurb that gives me a sense of proportion. I am engaging the universe in the incredible dance of existence if only in a small way.

Wintertime when it's too cold to grow things since I don't have a greenhouse and even a greenhouse would have to be heated to grow much, then is just the time to kick back and think about the systems to come or how things might have gone differently in the past.

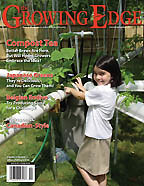
I particularly like quadrille tablets since I can lay out designs precisely on the grids and they also make it easy to organize data into columns. The picture is of tracking tomatoes in season but I keep a notebook all year around. I've graduated from the little spring scale seen here to one of those nice electronic scales which instantly give you a precise digital figure up to five pounds which easily handles all my tomatoes. I did have a 2 pound one once, but it was cheating a little by growing together with another tomato.

I'm actually all set for the Spring and Summer of 2009 with seeds, nutrient, some basic components for the Year of the Passive Systems, like float valves and smart valves. But I still have some design and further conceptualization to do. I'm thinking about some wick systems, maybe some float systems, using the smart valves you basically have a sort of float and drain system. Right now the idea is to have a big nutrient tank on the side deck running down to feed nutrient to the systems on the ground level below the deck. That way the system will auto-feed and I'll only have to top off the tank now and then. But if I create a lot of systems I'll also have to have bigger tanks so there is a size compromise to consider. Just like my eyes are often bigger than my stomach when I'm contemplating food, my appetite for hydroponics systems often exceeds my common sense and need for hundreds of pounds of tomatoes. I do have six seed varieties picked out for the system and one really needs to have at least maybe four of each kind so that puts about 24 plant sites as the minimum. Scaling that with my NFT systems of the past would make it equivalent of a four tube system, and maybe that will turn out to be a six tub system. You can see that that creates other questions. Each tub will require a feed so the nutrient tank will have to split the feeds so we need ... well you get the idea.

Design is a bifurcating process, one thought leading to another, one requirement for one part of the system demanding something from another part. It's a logical chain and fun to think about. That's when you get out the notebook and start sketching. Sketching and reading and sipping hot chocolate on a cold Winter day is just the ticket.

Thursday, December 25, 2008

A Video from Growing Edge

Loafing around the house on Christmas day, presents opened, just relaxing I thought I'd do a little web-surfing through YouTube and came across this little hydroponics video. YouTube has a whole lot of interesting hydroponics videos and when I get the chance I'm going to look through a bunch of them and feature some that are worthwhile.

Friday, December 19, 2008

Functional Assemblies

Functional Assemblies is a fancy name for "parts" — the parts of the system. Any design requires something like an inventory of parts and a review of how they function. So let's start doing a little thinking about that.

The basic elements of a hydroponics system are:
1) A nutrient reservoir or tank (I usually use plastic 30 gallon trash cans but anything watertight that doesn't leach anything into the nutrient would be fine), 2) some sort of delivery system to make the nutrient available to the plants, 3) plant growing sites, 4) support for the plants as required, and 5) a monitoring system for making sure the system works and continues working properly.

We've addressed the nutrient problem by buying a bunch of Total Gro 8-5-16. We've only thought a little about the delivery system. Right now I think a tank on the side deck with gravity feed to the passive plant sites will maintain the nutrient delivery. The tank will have a flexible hose with splitters to deliver individual feeds to different plant sites. To facilitate that design I've picked up a couple of Jim Fah's Smartvalves and for the sites that are not smart valved I'm planning to limit the nutrient with float valves. That only leaves the support system to worry about.

Tomatoes need a support system because they are heavy. Right now I'm thinking that using thin-wall conduit supports similar to those I've used on the NFT systems will fill the bill. We'll see when you go into more detailed design mode. I'm going to need at least twelve plants sites since I have six tomato varieties and I want to plant at least two of each. But if plans go as they usually do I may expand that. I don't want to have to pay too much attention to the system so that either will limit the number of plant sites or expand the size of the nutrient tank.

Tuesday, December 16, 2008

Design Evolution

Designing a system is a matter of sorting out the parts you're going to need and finding suitable candidates. I always like to walk through hardware stores and home supply stores that stock all kind of gardening and other plastic containers and things that can be turned to hydroponics use.

He's a little float valve I found which I think might come in useful for my passive systems this Summer. I found this little value on ebay
so I bought a couple at $7 each. They are cute little devils, only about four inches and the seem well suited to controlling the nutrient depth in the subordinate growing tubs I envision for one of the variants of the passive systems. I looked at some other float valves too but they were bigger and made for animal feed troughs.

Wednesday, December 10, 2008

The French Dona

I have a sig line on my email that I've used for years. On the search for the PERFECT tomato It's a line that is meant to work on a number of levels. PERFECT-anything is beyond this world and a search is a quest. tomato is an old slang word for an attractive girl. Early in my hydroponics tomato growing I did fall in love with the French Dona, a medium size indeterminate hybrid tomato that is perfectly beautiful, round, a luscious red, and simply delicious. It doesn't hurt that my wife has some French heritage so I kid her that she is the PERFECT tomato, and a French Dona (Lady) as well.

But don't just take my word for the fact that this is a great tomato. When I was looking for seeds yesterday I first looked in my Totally Tomatoes catalog where I have usually purchased my seeds. No French Dona was to be found. Then I googled French Dona and found a nice entry on Reimer Seeds but they didn't have any. Renee's Garden gave me the horrible news:

"Dona is a hybrid tomato from an old French seed company. As you may know, hybrids need to be made by hand each generation. A seed company has to maintain a pure line of both the mother and the father tomatoes, and cross them each time the hybrid seed is being produced. The company decided for their own reasons that they wanted to discontinue making the variety Dona - probably they have something they think is better, but still want to keep the parent lines for their own continued use, so the breeding material isn't available to other people to make the hybrid cross themselves. So that ends Dona as we have known it. ..."

Frankly I'm horrified, so part of my seed quest is to see what can replace the Dona in my tomato love life. Just in case you think I'm exaggerating let me point you at another link that talks about the Dona. Dave's Garden

So I was pretty happy when I found some Dona seeds (see yesterday's post) I also may have some old one's in the basement but they may be too old to germinate. It should be an interesting Spring.

Tuesday, December 9, 2008

Now We Need Seeds!

This is the first year I've bought seeds at Gary Ibsen's TomatoFest, but when I visited their internet site at http://store.tomatofest.com/ I couldn't resist getting some of the seeds that would make my coming Summer of the Passive Systems a real adventure in diversity.

The pictures and descriptions are both drawn from their site. You should check it out. The tomatoes are arranged in the picture above with the Abe Lincoln in the upper left and the rest read left to right.

Abe Lincoln 12 oz

A popular heirloom tomato introduced in Illinois in 1923 by the Buckbee Seed Co. These organic tomato seeds produce brilliant red, round, medium-sized, 12 oz. tomatoes in clusters up to 9. A good disease resistant tomato. Delicious, rich, slightly acidic tomato flavors. You'll want to grow these certified organic tomato seeds year after year.

Dona 6 oz

This excellent variety was bred by the French specifically for their customers in markets, where flavor and quality standards are uncompromising. Slightly flattened, almost seedless, round tomato with a sweet/acid balance (just like the commercial hybrid) that few modern tomatoes can match. The heavily producing plants yield 6 ounce, juicy fruits that are smooth, meaty, and deep-red in hue. Good disease resistance.

Amy's Sugar Gem 2 oz

Developed by Dr. Jeff McCormack who crossed the small fruited 'Red Cherry' with the larger heirloom 'Tappy's Finest'. 'Amy's Sugar Gem' is named in appreciation of Amy Hereford whose grandmother "Tappy" introduced Jeff to heirloom tomatoes in 1982. The 'Sugar Gem' portion of the name refers to the sweet flavor and the tiny light gold sparkles in the red skin. Our TomatoFest organic tomato seed produces indeterminate, regular-leaf, tall, sprawling, vigorous tomato plants that yield HUGE crops of 2 oz., 1 1/2" golf ball sized, red, meaty, juicy tomatoes that have a small core and delicious sweet, well-balanced flavors. A perfect choice as a snacking tomato, salad tomato or for tomato sauces. Sweet! "Candy-on-the-vine," not to be missed!

Atkinson 8 oz to 1 lb

Introduced 1966 for southern, hot and humid areas by Auburn University. TomatoFest organic seeds produce indeterminate, regular-leaf, vigorous plants with good yields of 8 oz. to 1 lb., red, globe-shaped tomatoes that are very meaty with good, old-fashioned tomato flavors. Tomatoes are meaty. This is an outstanding tomato for sandwiches, salads and canning. Great for growing in Southeastern U.S. and tropical regions. Disease Resistant. A good choice to grow as a fresh market tomato.

Bloody Butcher 4 oz

A sensational and very popular, early producing tomato variety. A good choice for a tomato as you wait for later varieties to harvest. Our organic tomato seeds produce indeterminate, vigorous, potato-leaf plants that yield copious amounts of 2", 4 oz, fruits that are deep-red color, inside and out. Five to nine fruits per cluster with a rich heirloom tomato flavor. Plant produces well until frost. A good tomato variety for cooler growing regions since fruits ripen quickly. A good canning tomato.

Black Cherry 2 oz

The only truly black cherry tomato. Our TomatoFest organic tomato seeds produce large, sprawling, indeterminate, regular-leaf, vigorous tomato plants that yield abundant crops in huge clusters of 1", round, deep purple, mahogany-brown cherry tomatoes. Fruits are irresistibly delicious with sweet, rich, complex, full tomato flavors that burst in your mouth, characteristic of the best flavorful black tomatoes. Beautiful to mix with other colored cherry tomatoes. Unique tomato variety. Disease resistant. Once you try it...you want MORE.

Grouped by size:
  • 1) Amy's Sugar Gem and Black Cherry in the 2 oz range

  • 2) Dona and Bloody Butcher in the 4-6 oz range

  • 3) Abe Lincoln and Atkinson 8 - 16 oz

Monday, December 8, 2008

That was Easy!

caption: Mixing Nutrient Concentrate with 8-5-16 Way back at Summer 2

My TotalGro nutrient came to the house by Big Brown today. That was pretty quick given that I only ordered it a couple of days ago (well maybe a few more than that since the invoice says December 3rd so it's been five days). A plain cardboard box containing 50# of 8-5-16 Hydroponic Special Steiner Item #2034 was delivered.

So what's that? Well it's two bags of granular compounds, one is blue and the other is white. Since the whole comes to 50# and they are used in equal measure, that works out to about 25# per bag. So what did it cost. It was shipped from Winnsboro, Louisiana by UPS to where I live in Harrisonburg, Virginia.

The nutrient cost $58.76 + $24.21 shipping for a total of $82.97. Wow, that's a lot of money, right? Not really. The problem is that it is the minimum order, but when I use the nutrient I tend to use only about 5#'s of each per year and that's for large system with 42 plant sites (nominally). When you spread the cost over five years it is only $16.60 per year. If you check out the cost of liquid nutrients you'll find that that is dirt cheap.

What do I do with it? It's a simple two step process:
1) Step 1 is to make a concentrate of each of the two different solutions. I mix about 15 oz of blue in a gallon of water to make the blue solution, and 15 oz of the white to make a gallon of white solution. These are both concentrated. You don't use them on plants at this concentration.
2) Step 2 add equal amounts of blue and white concentrates to your nutrient tank water until you get the conductivity you want to run at. A standard conductivity of about 22 CF is produced by mixing about 1 oz of each concentrate per gallon of working solution.

You check the solution strength regularly topping off the tank with fresh water and adding concentrate to bring the tank back to the right conductivity. I have never seriously messed with pH. If you have a pH problem you may have to do that. It's not too much more complicated, but you need additional solutions and instrumentation so I would try to get by without it if possible.

Sunday, December 7, 2008

Tomato Varieties

One of the questions people are always asking is "Are there special varieties of tomatoes to grow hydroponically?" and the answer tends to be what I call the universal answer which is: "It depends."

There are tomato cultivars that industrial hydroponics growers tend to favor. Apollo, Belmondo, Caruso, Dombito, Larma, Perfecto, Trend, and Trust are all cultivars developed specifically for hydroponics. Click here for a bit more. One problem with cultivars adopted by commercial growers is that they tend to be selected primarily for yield and not for taste.

The fact is that you can grow any kind of tomato you want in hydroponics. I've grown at least twenty varieties over the years. I prefer indeterminates just because they yield better in my experience but I have not grown enough determinates to make that a hard fast rule. It is simply amazing how many different kinds of tomato plants you can buy seeds for. One problem I have is that I swear they keep changing the names. Lots of the varieties are hybrids.

Let me mention just a few. The first cherry tomatoes I ever grew were Sungolds. I've also grown Mexican Midgets which are nice little round cherry tomatoes. I've also grown larger tomatoes especially the Big Boys, Better Boys, Beefsteak that my wife thinks are the only real tomatoes because when you slice one the slice covers the bun. But my all time favorite tomato is the hybrid French Dona. It's not a large tomato but it is beautiful, round and luscious red, and very very tasty. But don't just take my word for it. Check out Dave's Garden

Whatever you decide to grow, it's fun to grow a variety of things and experiment a little every year.

Tuesday, December 2, 2008

Seeds and Nutrient

What should appear in my mail box today but not one but two seed catalogs. Totally Tomatoes and the Vermont Bean Seed Company. Seeing seed catalogs is motivational. Both of these catalogs are great. Since I'm mostly a tomato guy with a nod in the direction of cucumbers and peppers, the Totally Tomatoes catalog is usually the one I turn to first. The Vermont Bean catalog has a lot of other fascinating stuff though, so you might want to check it out.

I ran out of nutrient the last time I fielded a full system which was the Summer of 2007, we went on vacation instead and I injured my shoulder. The injury and resulting surgery pretty much kept me out of commission in 2008 so I did some image processing research on the shroud of Turin instead and gave a couple of papers at the Columbus Shroud Conference.

Now I'm getting geared up for Summer 2009 the year of the passive systems. The contemplation of a new system reminded me that I needed to order nutrient so I called TotalGro (SDT Industries) in Winnsboro, LA (1-800-433-3055) and ordered a 50 pound sack of their 8-5-16 Hydroponics Special/Steiner Formula. I've grown just about everything with that stuff. It's a two part powdered nutrient. I mix it up as a two part concentrate and then add it to my nutrient tank as required to maintain whatever nutrient concentration I'm using for the plants in question. The 50 pound sack is the minimum order and that generally will hold me from five to 8 years depending on how large my systems are. But even with shipping and handling it is less expensive than many hydroponics nutrients sold in liquid form in relatively small quanities.

Sunday, November 23, 2008

Winter time is Design Time


Well it's been cold enough the last few days to convince me that even if it isn't Winter yet, Winter is on the way. Thanksgiving is next week and my youngest son will be graduating from Navy Basic Training shortly. I've begun sketching ideas for the coming Summer. I want to be able to take a vacation and not worry about my electricity failing and losing all my plants, so this seems like a good year to explore the wonders of passive systems.

Have you seen those dumb watering globes that some folks are peddling on T.V. You fill them up and stick them in your plant container into the dirt and somehow they are supposed to meter the water into the soil. I did a little web research and "surprise, surprise" the vast majority of the comments were very negative. They clog, they don't work right apparently most of the time dumping almost all the water into the soil immediately and flooding the plants. Why am I not surprised? A lot of those $19.95 for the miracle product things on T.V. are just con-jobs. If your experience differs, please let me know.

I mentioned that I picked up a couple of smart valves for one of the passive systems. Then I'm thinking about variations on wick-system design. The other thing I thought I'd do is try to figure out how to use inexpensive float valves to control systems but first I have to find some inexpensive float values — they all seem a bit pricey.

So what elements will I need? It's always a good idea to think about what you're looking for. I think I need: 1) A nutrient tank, 2) Some sort of feeder to feed nutrient into the plant sites, 3) cheap and reliable float valves that work well at low pressure (might just use toilet float values but I want something that is easy to modify), 4) A set of plant containers of some sort, 5) Passive media for the containers.

Saturday, October 18, 2008

The Growing Edge Arrived ...

I got my copy of The Growing Edge Vol. 20 No. 2 November/December 2008 just yesterday and it has a nice article by me in it about getting started in hydroponics. Simple systems allow a person to get started in hydroponics pretty easily. It doesn't get any easier than a wick system or a float system. Pick up an issue and take a look. There are even a couple of pages from my notebooks.

Sunday, October 12, 2008

More on Passive Systems


This is the time of year (mid-October) when my mind tends to turn to system design. What should I do next year. I've had two pretty tame Summers since I've taken a vacation last Summer and this Summer I worked on a study of image-processing and the Shroud of Turin which I hope will be up on the Ohio Conference Shroud site by the end of December. That tends to mean that next Summer it's back in harness growing tomatoes. But I want to take some time and drive around and visit some folks and now that our youngest son has gone off to the Navy there's no-one to tend the hydroponics system when we're away.
"If anything can go wrong it will" is one formulation of Morphy's Law, so leaving a hydroponics system to its own devices when it depends on the electrical mains is a recipe for dead plants. So I've been thinking about passive systems. I've mentioned wick and float systems. One passive system I've mentioned only in passing is the Auto-Pot system which uses a clever little device known as a Smart-Valve. Jim Fah invented this gadget and you can read about it HERE.

Jim Fah's Smart Valve and the Auto-Pot System


The Smart-Valve is the "brains" of the Auto-Pot system. It consists of a couple of interconnected float valves that both limit the height of the nutrient fed to a plant and prevent new nutrient from being added until the level drops to a predetermined lower depth. This little trick nicely simulates the way plants experience nutrient in the real world of dirt growing. I used one of Jim's valves on the Deck System long ago in Summer One and it worked just fine. I chose to use NFT instead in the intervening years, but I've always had a soft spot in my heart for passive systems. So a week or so ago I bought two of Jim's latest valves and I'm going to test a mix of passive systems this coming year to see just how much difference it makes to the plant to simulate the real-world nutrient cycle.

Sunday, October 5, 2008

Passive Systems

Passive hydroponics systems have a lot of advantages. You might ask: "What's a passive system?" The short answer is one that doesn't need electricity to operate. The two easiest passive systems are 1) wick systems, and 2) float systems. There is a third form of passive system which is a bit more technically sophisticated, but not much, called an Autopot system. Let me quickly summarize each.

Wick Systems

Wick system are two level systems. The nutrient is in a tank below a cover and the plant is mounted on the cover with wicks which go down into the nutrient tank. The nutrient feeds up to the plant by capillary action and the roots of the plant follow the nutrient moisture down into the tank. It is completely passive and very easy to construct. Plants don't typically grow as vigorously in a wick system as they do in an NFT system, but they do well.

Float Systems

Float systems are usually best suited for plants that are fairly light since heavy plants with substantial support requirements will tend to weigh down the floats and submerge the system or the floats will have to be large. I have used floats very successfully to grow basil and lettuce. You get Styrofoam sheets to make the floats and cut holes for little plant cups in the foam. Since the system actually floats on the nutrient the bottom of the cups are in the nutrient so while you could use wicks they are generally unnecessary. Rather quickly the roots grow down into the nutrient. You can oxygenate the solution using aquarium air pumps but then you need electricity. My experience suggests that if you design your plant cups so there is a relatively dry interval they can get oxygen via that route. There's a photo of a float system growing basil in the sidebar.
I'll leave the Autopot system for my next post, since it is more complicated and deserves its own discussion.

Monday, September 22, 2008

Flowing Nutrient to the Channels


When I first started doing NFT (Nutrient Film Technique) hydroponics I would flow a large amount of nutrient through the channels by connecting a flexible 1/2 plastic tube from the pump and running it all the way to the end of the channel. This made for a lot of flow. One thing I noticed is that the tomato plant roots grew at an incredible rate and wound end up coming out the ends of the tube at the tank end and grow into the tank. Really long roots. By the end of the Summer in some years the roots would be so thick that the nutrient would actually start over flowing out the sides of the holes in the channels for the plants. That was just too many roots. I tried cutting down on the flow and that actually seemed to reduce the root growth.
In the picture you can see the way I feed my channels now. I run a piece of 1" PVC parallel to the channel (a piece of 4" diameter PVC with 3" holes on 17 inch centers) and drill a 6mm hole and thread a 1/4" piece of plastic tubing to a hole at the end of the channel. This restricts the flow and delivers plenty of nutrient to the plants. The result is roots that still grow rich and healthy but don't totally fill up the channels. It works really well.

Tuesday, September 16, 2008

Friends


One of the delightful things about hydroponics is the friends you meet. I have a folder on my computer that I put pictures that people who have read my articles in The Growing Edge have sent me. Some of them are pictures of systems modeled after some of those that I've built and others are just folks wanting to share their own excitement about hydroponics.
Jim Duffy's peppers, pictured above are an instance of the latter. You can visit Jim at http://www.refiningfirechiles.com/Jim had been growing hot peppers, and Jim tells me that his peppers are the hottest you can imagine. He lives down San Diego way where they know about such things. Jim started growing his peppers using NFT (Nutrient Film Technique) and they took off. Here's an example. Jim has never seen peppers yield like this and he's excited about it and shared his excitement with me. I was very flattered.

Sunday, August 31, 2008

Looking at Roots


You don't need a whole lot to get started in hydroponics — just a plant and some nutrients and you can even experiment with your own mix of nutrients. It's helpful to have a conductivity meter to have some idea of how strong your nutrient mix is but once you have that you're pretty much good to go.


The picture here is of a system I used to grow tomatoes inside in my home office over one Winter. After a while they grew so large I decided that when the Spring came to retire the system and took it outdoors. Here I'm spreading the root mat that had developed over the several months the system was growing indoors. The system itself was just a simple wick system. A wick system just starts by putting rags or strings or anything that will "wick" nutrient up to the plant. It isn't long before the roots follow the moisture down into the nutrient solution and the wick itself become somewhat superfluous. The roots themselves form a fine webbing that draws nutrient up to the plant. It's quite a fascinating thing.

Saturday, August 23, 2008

Sometimes things don't go well ...


When I was first designing systems (design is probably an exaggeration) I just secured channels to sawhorses, two to a pair of sawhorses. The tricky thing was trying to figure out the support structure. Tomatoes need a lot of support. The first try was to make a little A-frame and run strings from it, but that made the tomatoes grow together and form a total rats-nest jungle.

So the solution was to build individual vertical supports, so I created a set of wooden frames but I made the frames with wood that was way too small. (I can hear my wife snickering — she's better at visualizing disaster than I am. She's never said "I told you so", just rolled her eyes a little.) With the help of my son Christopher we build some frames, but as the plants grew and grew the frames began to tilt and the horizontals overhead that the strings were tied to began to bow. We saw we had a problem so we tried to brace things with a rope. But then one fateful day, while I was adding nutrient to the tank I noticed the frames leaning over more and more and suddenly the tipping point was reached — Whoomph! Down they went. That sent me back to the school of more rigorous design.

Friday, August 22, 2008

Growing Indoors and Friends


Shortly after the first article I wrote about hydroponics appeared in The Growing Edge I got an email from Marlan Showalter. He described himself as an enthusiastic hydroponics hobbyist himself and said he had a store in the Dayton Farmer's Market, a regional attraction in Dayton Virginia where a host of small proprietors from the Mennonite community did business.

I just figured anyone in business would likley be middle-aged, so when I went down to meet Marlan I expected at least a 30 something to 40 something fellow. So you can imagine my surprise when Marlan turned out to be a personable young man of about 20. He was selling a variety of produce in his shop including hydroponically grown lettuce from a local hydroponics grower. To show people what hydroponics was all about he had a little system growing lettuce under flourescent lights. (see the photo) This is a miniature two channel system. The lights are just a tad anemic for growing lettuce but it will grow. Many plants that are able to grow in deep shade will grow just fine under flourescent lights, but from the viewpoint of what plants expect, they are not all that bright.

Thursday, August 21, 2008

You Can Grow Anything

One of the amazing things about hydroponics is that it is so open ended. You can grow almost anything, it's just a matter of getting it fine tuned a little and often that's not even much of a problem.

I've personally grown tomatoes, cucumbers, peppers, lettuce (several varieties), beans, herbs, strawberries, corn, egg plant, and squash. Some plants don't like to be grown with others because of different nutrient concentration preferences. For example lettuce runs at a lot lower nutrient concentration than tomatoes. But as long as you check it out you can generally grow it. I remember being astounded that you can even grow roots crops and I actually grew a rather stubby carrot one time and people grow potatoes.

If there is a way to grow it in dirt, there is likely a way to grow it hydroponically. That is simply great fun!

Tuesday, August 19, 2008

Starting plants


It's pretty easy to start plants. I always start from seeds. In my experience starting with plants that were grown in nurseries or in dirt is just a recipe for getting pathogens into your nutrient and causing problems for all you plants. Starting with sterile media and seed minimizes the chance of problems developing. Think clean room. You don't have to be too excessive, but care will ensure that your plants get off to a great start.

Just for fun one year I took a plastic tub and turned it into a baby continuous flow system and used it to start plants. It was fun and easy. I took a very small pond pump and used it to pump nutrient to the cover of the tub and cut a hole in the other end and ran it slightly tilted. The only slightly annoying feature was that the algae liked it even through it was flowing continuously and I got a little algae build up on the cover. The plants liked it to though so it was a fun way to get my plants started.

Wednesday, August 13, 2008

Getting Your Plants Started and Helpers


Once you start out in Hydroponics it's remarkable how many friends show up to help out. Grandchildren are particularly fascinated by what you're doing there grandpa? Here in the Shenandoah Valley of Virginia the first day you can be sure it won't freeze is somewhere around May 18th, although I've occasionally been surprised even then.
The picture above shows me putting seeds into a bunch of rockwool cubes to get my tomato plants started. I've done it a number of different ways, but one of the easiest is just to put them in a tray and put some diluted nutrient, about a quarter to a half of the concentration you'll use when the plants are mature and let the plants start in the rockwool.
Generally what I do is soak the rockwool ahead of time just because they say you should (I've never known it to make much difference). Then you can let the plant sprout on its own steam. There is enough nutrient in the seed to get it going, but then you'll want some nutrition once it sprouts.

Tuesday, August 12, 2008

Compounding Your Own Nutrient


I think I mentioned before that when I first started out doing hydroponics I thought compounding my own nutrient would be really neat. I enjoyed high school and college chemistry. My dad used to tell stories about some of his chemical escapades ranging from making gun powder to creating dots of something like nitro-tri-iodide and putting drops of it on the marble floor near the chemistry lab.
So when I first started I thought, "Gee I can mix chemicals!" But there is a lot of math involved. I thought I'd just give you a touch so you'll have the idea.
Nutrients are given in ppm (parts per million). That sounds a little threatening, but it really only means something like 1 mg (milligram, a thousandth of a gram) mixed into a liter of water (1000 grams of water is a liter). See that wasn't too awful.
It gets a little worse when you have to calculate the ingredients available to the plants when you mix various nutrient compounds into the water. Take Calcium Nitrate (Ca(NO3) 2) as an example. If you want to end up with 100 mg of Ca (Calcium) in the nutrient and you're using Calcium Nitrate you have to add up the atomic weights to get the molecular weight
  • Ca = 40.08
  • N = 14.008, and
  • O = 16.00
But there is only one calcium atom while there are two nitrogen and six oxygen atoms. So the total molecular weight of Ca(NO3)2 is 164.096. So it takes 164 milligrams of calcium nitrate to get 40 mg of Ca and you get 28 mg of nitrogen with it in the nitrate ions. To formulate a total nutrient solution you have to mix a number of water soluble salts into the water in just the right combination and amount. Once you fool around with it a bit you decide if you just want to grow tomatoes that you should leave it to the experts.
I'm always reminded of making a telescope because you want to look at the stars. I had a childhood friend who started doing that and got hooked on making telescopes. The only time he ever looked at the stars was to test his telescopes by looking at double stars.
I need to credit Howard Resh's Hydroponic Food Production for the discussion on calcium nitrate.

Monday, August 11, 2008

The roots follow the nutrient


One of the things that surprised me a lot when I first started doing hydroponics was the extent that the roots grew. The tomato plant's roots would follow the flow of the nutrient and each plants roots would become entangled with the plant down stream of it. The tomato plants that were nearest the nutrient tank would grow roots that followed the nutrient right down into the tank.
It was common to have root masses that towards the end of the growing season in September would totally fill the 4" PVC pipe so that the nutrient would get close to running over the side right out of the holes in which the plants were set. I have a picture of myself pulling out a combined root mass something like six feet long.
One thing I discovered is that if the nutrient flowed more rapidly it seems to stimulate more root growth than if it flowed more slowly. So after the first couple of seasons I cut down the flow rate of the nutrient appreciably by limiting the flow into the tubes to a 1/4 inch feed line. This slowed down the growth of the roots so that I didn't get channels filling up and threatening to overflow.

Sunday, August 10, 2008

The Miracle of Growth

One of the really fun things about hydroponics gardening is seeing the transformation of your system as the growing season advances. Here's a picture of the one-third Starburst. I called it that because fully expanded it would have nine channels, so the three shown here are one third of the system. Of course with nine channels the tank would probably have to be bigger since even at this size the tank tends to go down a lot during the day unless you run the system with automatic dosers and keep the water topped off with a float value.
Before and after says it all though doesn't it? Wow!

Saturday, August 9, 2008

Your Local Hydroponics System Supply Store


You can find all sorts of wonderful things to make your hydroponics system at your local Hydroponics System Supply Store (read Lowes, Home Depot, Walmart, and stores that handle all kinds of plastic bric-a-brac.). In this picture from 2000, you see the nutrient tank (a plastic trashcan), PVC tubes used for channels and the system support frame, a plastic gutter used as part of the return system, gutter extensions usually used to run water away from the house at the bottom of rain spouts, and little plastic covered lidded container pressed into service to protect the conductivity meter from the rain. There is an automatic hobby doser mounted on the side of the tank and the hose is connected to a float valve.

There are all kinds of wonderful things in the stores that can be turned to use in making your systems. That is part of the fun of it, turning conventional things to new uses.

Friday, August 8, 2008

Bringing it All Together

Another approach to channel organization is the "Star" system which arranges the channels radially. The good news is that this solves the problems posed by the parallel organization. The bad news is that it has some problems of its own. The solutions are:
  1. You can get to all the channels much more easily.
  2. The nutrient return to the tank is easy since they are all arranged radially.
  3. You can manage each channel individually since they are all fed individually.
So what's not to like? Well into every life a little rain must fall, as my mother used to say. The Star-architecture has a few issues:
  1. Each channel requires its own support structure. I solved that with the pedestal mount which works pretty well and is fairly each — but you need two per channel.
  2. Distribution of the nutrient requires a nutrient feed tube for each channel. I do that by bungie-cording them onto the channel, but
  3. That requires a manifold to distribute the nutrient. You can see it sticking up there out of the tank. Each channel nutrient distribution tube has it's own feed. These can be "turned off" by removing the (whatever they call'em — thingie) and replacing it with a plug which screws in.
  4. Notice the black stuff (that's a ground cover plastic and it is essential) — You have to keep the nutrient dark (as in let no light in) or you will be the charitable host of algae which will eat your nutrient and gum up your pumps.
  5. Oh and did I mention the overhead structure which just got more complicated too. Each channel needs an overhead structure from which to suspend strings on which to attach and support the plants. Like the channel support this requires two verticals per channel.
So all is not a rose garden. But still the star system is cool. The header has a picture of a six tube star system as it was put into practice. I've obviously inspired some imitators since other hobbyists have sent me pictures of their stars. Once you've created the pieces (which are mostly just cut to length and drill a few holes) you can put the system up in about an hour or two. It comes down more quickly but you have to clean out the channels and as experience has taught me, sanitize them as well or you're inviting plant diseases in subsequent years.

Thursday, August 7, 2008

Organizing Your Channels

Arranging your channels can make a big difference to system design. This is an example of arranging the channels in parallel. At first that seems like a great idea, very geometric and regular. What it does mean is that you can minimize the support structure, here it is just two U-shaped sections of thin walled conduit. There are two down sides in my experience:
  1. You can't get to the inside channels easily and as the plants grow it becomes a jungle. But even at the beginning it is impossible to reach the inner channels to manipulate the support strings or maintain the system.
  2. You have to build a nutrient return to the tank.
So this is an example of a channel organization that seems quite natural but doesn't work out all that well.

Wednesday, August 6, 2008

How does that work again?


In a NFT (Nutrient Film Technique) system the plants are put in a channel (usually flat bottomed for a purist) and nutrient is pumped to the end of the channel and flows by gravity back to the tank. In the detail at the right you see the way I mount my channels. There is a 3/4" thin walled conduit pounded into the ground for primary support and then a piece of 1/2" conduit is dropped in on which a little pedestal is mounted which has a carriage bolt through it. A 3" hold is drilled in the channel where the plant is mounted. A parallel PVC tube carries the nutrient to the end of the channel where it is fed in with a 1/4" tube into a drilled 6mm hole. Works well!

Tuesday, August 5, 2008

Support System


When you grow plants like tomatoes or cucumbers or even peppers you need to support them. This requires a support structure of some kind. When I was first starting out I used an A-Frame but that really doesn't work too well because it draws the top of the plants together. You get enough of a jungle as it is, but if you force the plants together then you get such a tangle that finding the fruit can be an adventure.
So what's the solution? Well you'd like something that goes straight up, but it has to be able to handle a fair amount of weight. I've never actually estimated it, but it might end up being almost a hundred pounds, certainly over fifty per channel.
The solution that I finally came up with was thin-walled conduit. I drop 3/4 inch conduit into 1" conduit supports and then run cross beams of 3/4" conduit by joining it with 90 degree 1" conduit bends. Then I cross brace with 1/2" conduit held in place by wrapping it with those small bungie cords. The picture at right shows what my overhead structure looks like on a fairly large NFT system in the backyard.

Monday, August 4, 2008

Measuring Nutrient Strength


You won't be doing hydroponics too long before you discover that you can't do it very well if you don't know how strong your nutrient solution is. The plants need to be fed consistently at an optimum strength and the usual way to control this is with a conductivity meter. (See the picture at right of the Dipstick which is about $85 and a slightly more recent version of the first instrument I got for doing hydroponics).
When nutrients (non-organic salts) are dissolved in water they disassociate into ions and make the water slightly conductive. Using a meter you can tell how much dissolved nutrient is in solution. Unfortunately you can't tell the composition, i.e. how much of different nutrients make up the solution. So ever few weeks it is a good idea to dump the nutrient and remix to reestablish a known nutrient composition. This can be done when the tank has gone down a good bit so that relatively little nutrient is lost.
If you want to see a selection of meters you can CLICK HERE and it will take you to a Portland Oregon firm, American Agriculture. This is just an example of what is out there.

Sunday, August 3, 2008

Simple Systems


Among the simplest kind of systems you can build is the float system. Here's a picture of an easy one. You probably recognize a couple of those plastic organizing tubs you can get for a few bucks at the store. The particular system uses styrofoam to literally "float" the system. Holes cut in the styrofoam are filled with little cups with the plants in them and nutrient is mixed into the water.

The system is aerated by a small aquarium pump to make sure there is oxygen in the nutrient. The system in front has some garden lettuce in it and the system in back has Romaine. It grows like gangbusters and you never have to water or weed. You do have to check the water level and nutrient concentration every couple of days. That takes about two minutes.

Saturday, August 2, 2008

Starting Plants


Getting plants started is pretty much the same as with ordinary gardening except that you generally want to start them in a passive, non-organically based medium. The main reason for that is to make sure you don't get either disease organisms or a medium that will distribute particulates into your nutrient solution where, if you're using NFT or other methods that require pumps, the particulates can interfere with the pumps.
The picture here is of a cucumber plant started in a perlite cup and embedded into a hole cut in a 4" diameter 10' long PVC channel which nutrient flows down. To prepare the cup I generally put a little loose rockwool in the bottom of the cup after cutting triangular cuts in the bottom sides of the cup which I fold out. The rockwool fills the cup to over the height of the triangular cuts so that the perlite that I put on top doesn't have a chance to flow out into the nutrient solution. The use of the perlite ensures that there is a portion of the root zone that is easily accessible to oxygen and keeps the cucumber roots from being too flooded over their whole length. My experience is that the cucumbers like this a bit better than just being rooted in rockwool cubes.
I position the cup in the channel so that the holes lie directly in the line of nutrient flow. When the roots get down to the holes they exit into the nutrient flow directly so the plant always has lots of nutrition. That's really all there is to it though. It's pretty simple.

Friday, August 1, 2008

Keeping Notes

Whatever you do when you're dreaming about doing your own Hydroponics Garden and having your own personal adventure, you want to keep notes. Nothing succeeds like a well thought out strategy. I always keep a quadrille notebook and sketch out my ideas for systems. It's great fun, especially on some of those lazy Winter days when you don't want to go out because it's too cold.

As May rolls around you don't have much time. Here's a page from my notebook back in 2002 when I put out all sorts of systems. There was a 4 tube 2/3rds Star System, an NFT lettuce system and a table full of tub float systems.

As I was dreaming up the systems I'd draw these diagrams and make notes of what I might need. Then it was off to the design center (Lowes, Home Depot, Walmart, ... wherever there are plastic bric-a-brac from which to cobble up a system. Each and every design is an adventure.

Thursday, July 31, 2008

Nutrient Note


Here's a little extract from my article "Summer 7 The Year the Star Fell" about nutrient.
---
The nutrient is just a mixture of simple salts. I use a formulation based on the early 1960's work of Abram Steiner in Europe. It is a very well balanced solution for growing tomatoes and works fairly well for a wide variety of other plants. I've personally grown basil, several varieties of lettuce, bok choy, cucumbers, peppers, especially jalapeno peppers, tomatoes and as a lark I've grown some egg plant, squash, and corn all with this nutrient. In addition to being very efficient in the use of water and fertilizer ( hydroponics is also weedless and more critter-less than most growing methods.
---
I personally use Total-Gro 8-5-16 Hydroponic Special Steiner Formula compounded by SDT Industries Inc. of Winnsboro, LA. They have a great Grower's Guide to Plant Nutrition in a pdf file on-line. The Steiner 8-5-16 is on page 39. This is great stuff.

It comes as a two part mix. I take the mix and mix two concentrates, blue and white named for their color. The concentrate is a pound of each mixed into a gallon of water. Then to make working strength nutrient, mix an ounce of concentrate (an ounce of blue and an ounce of white) per gallon of target solution. You will want to use a conductivity meter to get the strength exactly where you want it — but that's a good starting position for tomatoes, cucumbers and peppers. Lettuce and basil want to run very much weaker.

Unless you want to compound your own, that's about as much as you need to know about nutrient. If you want to maximize yield and quality for a specific crop you'll want to look for taylored nutrients perhaps, but Steiner is a great all around nutrient, especially for getting started.


Wednesday, July 30, 2008

Books .. books .. books

There is hardly a cheaper way in the world to get started on something than to just read a book about it, or maybe two or three. When I was in high school I got in a chess tournament. I thought I was hot stuff, but on the first day I got my clock cleaned thoroughly by almost everyone in sight. That was an eye opening moment.

After school I went to the library and took out five books on the game of chess and for a while chess was a consuming passion and pretty soon I was the best player in the school. What that taught me was that having a passion for something counted big time.

When I started in hydroponics I jumped in with both feet following my tried and true technique of booking up on the subject. I think I've already mentioned my first book. It was Howard Resh's Hydroponic Food Production. That was a great start although it was a bit heavy going. Since I have a degree in science (Physics) it wasn't too tough and to give Howard credit, I think he wrote a very readable book there.

My next book was a hoot, because I found it on the internet. I was surfing the net and ran across this book that sounded terrific at a site. This was before Amazon and Barnes and Noble were net presences. I sent email to the site address and asked about the book and if they took credit cards. The guy replyed — "You do know we're in Australia?" That was so cool I bought the book and it came in a week or so by mail. It was Dr. Struan Sutherland & Jennifer Sutherland's Hydroponics for Everyone. It's a great book with oodles of color pictures. And even coming from Australia it was priced very reasonably.

There are now many books on my hydroponics bookshelf, but one I want to mention is Lon Dalton and Rob Smith's Hydroponic Gardening. It's a great book, compact, stuffed with great information and beautiful color pictures. I met Rob Smith on the West Coast at a Hydroponics Conference some years back and he's a regular on The Growing Edge, my favorite Hydroponics Magazine. I write for them, and they're a terrific bunch.

So the punch-line — "Before making a big investment, make a wise investment and read some good books on hydroponics." I suppose you could also watch this blog and I'll try to talk about all the mistakes I've made over the years. That'll lower the number you're likely to make.

Tuesday, July 29, 2008

Another cool system ...


Here's another cool system. I called it "Over and Under" because it had two high channels, the "over" channels and two low channels, the "under" channels. The idea was to see if I could train the plants to grow down. I could but it put stress on the plants. So I need to find a better support system.

What's a System Look Like?

I thought I'd explain what a system looks like and at the same time experiment with this blog's image capabilities. I have some images over at Flickr and I'm going to try to embed one of them. So here's the image of an NFT (Nutrient Film Technique) system I built a few years ago. I did it to experiment with growing leafy crops like lettuce. Up until then I'd only done tomatoes.

hydroponics NFT system
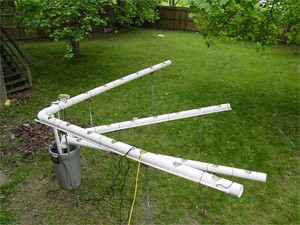
So here's the example. It's shown while it was being built. The frame is just PVC with flat channels. The trash cans (one of them) will be used as a nutrient tank (water + nutrients) with a pump in it which pump the nutrient to the ends of the channels. You can see the main feed tube (black) that feeds a PVC pipe and each of the channels if fed by a little 1/4 inch tube from the PVC pipe. The nutrient rums through the channels by gravity and is collected by the return and runs back into the tank. This little circulation goes on all the time.

As long as the electricity holds out and you don't let the tank go dry (plants use a lot of nutrient and water as they grow) that's the whole deal except for a few picky details like making sure that the nutrient is at the right strength to feed the plants. Simple and fun! Also pretty trouble free.

Monday, July 28, 2008

How to get started ...

I saw a video by an Oxford professor one time which talked about the Oxford way -- which was "Start at the beginning. Go on to the end. Then stop!" On the whole that's good advice if you're going somewhere.

In the case of hydroponics the key question that arises in "newbie's" minds is: "What is this? It sounds weird." "You're going to WHAT? grow vegetables in water?" "Give me a break. Is this science fiction?"

Hydroponics means something like "water works." The hanging gardens of Babylon are thought by some people to be an early example of hydroponics. Broken down to simplest terms it's just growing plants without dirt in a solution of water and nutrients. Last time I mentioned that reading a good book is a great way to get started. Another way is just to start experimenting with a sense of adventure. All you need is 1) a container, 2) some water, 3) some fertilizer, and 4) a plant -- at least to get started. Later, when you get interested in doing it right or getting the most out of your plants, you'll want to get a little more systematic.

Sunday, July 27, 2008

What Got Me Interesested?


Gardening is one of those things that you either love or hate. I always sort of hated it. It was too frustrating and way too much work. On the other hand, I really liked to see things growing and it was pretty cool when the things were things I'd planted and nurtured.

Still there were weeds to be done away with and critters to defend against that liked to come and nibble on things, even birds sometimes would come down and peck a tomato leaving a puncture.

I've always read science fiction and occasionally I'd read that hydroponics was the way that they would grow food on the space ship or the space station. Of course I envisioned all kinds of glass tubes and strangely colored mixtures of goop, having no idea about the real thing. Then I read somewhere that hydroponics as a great way to grow tomatoes. I've always loved tomatoes so that was the beginning of my adventure. If you could grow great tomatoes with hydroponics then I was all for it.

The first thing to do was to find out more, so I purchased Howard Resh's textbook, "Hydroponic Food Production." It turned out to be a pretty heavy duty book, pretty heavy in the weight category too. But it was clear and authoritative and I ate it up and decided to experiment on the side of the house with hydroponics. That was the Winter of 1995 I think.

Getting Started

I thought I'd start blogging on hydroponics. I've been doing it now since around 1995 with great satisfaction. I thought it would be fun to create a Blog and theWeedlessGarden is a title I've used on my website forever. My objectives are just to have a place to chat about Hydroponics from my point of view.